Let me start by saying—when I first became a metal clips supplier, I underestimated how many people struggle to hang pictures that don’t slip, don’t look lopsided, and don’t leave a trail of messy holes in their walls. I’d get DMs, emails, even phone calls from people panicking because their favorite print fell off the wall the second they let go, or they spent an hour measuring only to realize the hook they used was too small. Over the past seven years, I’ve worked with everyone from first-time renters hanging their college graduation photos to interior designers finishing luxury penthouses, and I’ve refined a step-by-step process that actually works—no fancy tools, no construction skills, just solid metal clips and a little patience. Metal Clips
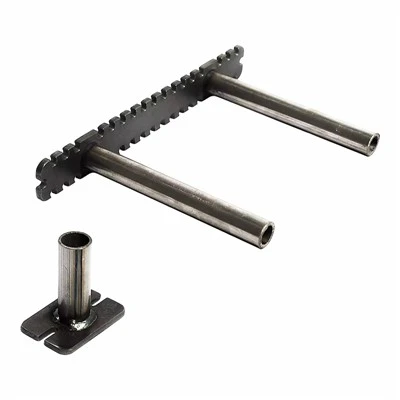
First, let’s talk about why metal clips are the better choice over other hanging methods. I know some of you swear by adhesive strips or nail-in hooks, but here’s the hard truth: adhesive strips lose their stick over time, especially if your wall gets warm from sunlight or humidity. Nail-in hooks leave larger holes that require patching if you ever move pictures around, and they can bend if your frame is too heavy. Metal clips? They’re designed specifically for securing frames without damaging your wall, they hold weight consistently, and they’re reusable. That’s not marketing talk— that’s from watching a teacher I work with use the same set of our clips for three different classroom art displays over two years.
Before we dive into the step-by-step, there are three critical things to figure out first: the size and weight of your picture, the type of wall you’re hanging it on, and the aesthetic you’re going for. I’ll break each of these down because skipping any one of them will lead to frustration.
For weight: metal clips are rated for different loads, so it’s non-negotiable to match your clip to your frame. A tiny 8×10 inch print that weighs less than a pound can use our lightweight, slim metal clips—they’re barely visible, so they don’t distract from the art. But a large 24×36 inch canvas print, which can weigh 10 pounds or more, needs our heavy-duty utility clips. I always tell people to round up their weight estimate—if you think your frame is 9 pounds, go for the 10-pound rated clip. Frames often have extra hardware, like glass backing or a thick mat, that adds to the weight you don’t notice at first.
Next, wall type. This is where a lot of people mess up. If you’re hanging on drywall (the most common wall in homes and apartments), you have two options: drive the clip directly into the stud, or use a wall anchor if you can’t hit a stud. If you’re on a plaster wall, which is older and more brittle, you’ll want to avoid forcing the clip in—plaster cracks easily, so our special plaster-specific clips have a wider base to distribute weight evenly. If you’re renting and can’t put holes in walls at all? Wait, yes—we make removable metal clips too, no nails required, they grip the top edge of your frame and the wall with a non-slip pad that doesn’t leave residue. I’ve used these myself in my old apartment, hanging a full gallery wall of my travel photos without any landlord complaints.
And don’t forget aesthetic. If you’re hanging minimalist, framed black-and-white photos, you’ll want our flat, matte silver clips that blend into the frame or the wall. If you’re hanging colorful, eclectic art in a kid’s room, our brass gold clips add a warm, playful touch that doesn’t overpower the art. The right clip size and finish can make or break the look of your display, so take 30 seconds to match it to your space before you start.
Now, let’s get to the actual process. I’ve tested this with hundreds of clients, and it’s the most consistent method I’ve found. I call it the “three mark rule” because it avoids lopsided pictures, which is the most common complaint I get as a supplier.
Step 1: Prepare your frame. Lay it face-down on a flat surface, like a table or the floor, so you can work without damaging the art. First, remove any existing hanging hardware—those flimsy plastic D-rings or small wire that comes pre-attached to most frames. Why? Because generic wire isn’t designed to hold your frame securely, and it’s too easy to pull tight and warp the frame’s edges. Instead, our metal clips act as both the support and the hang point.
Next, measure the top edge of your frame. You’ll need two clips, right? Even for a small 8×10 inch frame, two clips are better than one—they distribute the weight evenly, so the frame doesn’t tilt to one side. Mark the midpoint of the top edge, then mark a spot 2 inches to the left and 2 inches to the right of that midpoint. Wait, why 2 inches? Because that’s the sweet spot for most frames—too close to the edge and the frame will droop, too far in and it won’t hang straight. For larger frames, like 24×36, you can go up to 3 inches from the midpoint on each side, just make sure the distance between the two marks is the same. That’s the first mark.
Step 2: Position the clips. Take your metal clip and open the gripping jaws—most of our clips have a simple spring mechanism, so you just press the two sides together to open them up. Align the top edge of the clip with one of the marks you just made on the frame. For frames that sit flush against the wall, you’ll want the clip’s back plate to be flat against the frame’s backing. For canvas frames that have a protruding edge, you can adjust the clip to grip the wooden stretcher bar instead of the canvas itself—this prevents the canvas from sagging in the middle. Once the clip is in place, fold the wire bail (the little metal loop on the back of the clip) straight up, parallel to the wall. This is the part that will hook onto the wall-mounted clip, so make sure it’s not twisted or bent at an angle. Repeat this for the second clip on the opposite mark, and double-check that the distance between the two wire bails is exactly the same. No cheating here—if they’re uneven, your frame will hang lopsided before you even lift it.
Step 3: Mark your wall. Now you need to mark where the clips will go on the wall. This is where the three mark rule comes in to save you. First, hold your frame up to the wall where you want it to hang. Step back three feet (I know it sounds silly, but standing close makes it hard to judge height) and adjust until it feels right. For most rooms, the center of a frame should be 57 to 60 inches from the floor—this is the standard eye level for most adults, so it’s not too high or too low. Once you have the height right, take a pencil and mark a tiny dot on the wall at the midpoint of the frame’s top edge. That’s your center line mark.
Next, hold the frame again, this level so the top edge of the frame is perfectly horizontal. You can use a phone level app—they’re free and work way better than trying to eyeball it. Now, measure the distance between the two wire bails on the back of your frame. Let’s say that distance is 16 inches. On your wall, measure 8 inches to the left and 8 inches to the right of your center line mark, and make two tiny dots. These are the exact spots where your wall-mounted clips will go. Why this works? Because it mirrors the distance between the clips on your frame, so when you hook them together, the frame will stay straight. No more holding a frame up for 10 minutes while your friend adjusts it—this method gets it right every time.
Step 4: Install the wall clips. Now, you’re ready to put the clips on the wall. First, decide if you’re hanging on drywall, plaster, or another wall type. If you’re hitting a stud (you can find a stud with a $10 stud finder, which I highly recommend over guessing), you can drive a nail directly through the wall clip’s pre-drilled hole and into the stud. If you’re not hitting a stud, or you’re on plaster or brick, use a wall anchor. Our clips come with matching anchors for every wall type, so you don’t have to run to the hardware store last minute. For drywall, a plastic anchor is easy to install—just drill a small hole, tap the anchor in, then screw the clip to the anchor. For brick or concrete, use a masonry clip that has a rubber grip to prevent slipping.
When you attach the clip to the wall, make sure the flat side of the clip is facing outward, toward you, and the wire bail is facing down toward the floor. You want the bail to be at the same height as the dot you marked. Once the first clip is up, double-check its height with your level, then install the second clip 16 inches (or whatever distance you measured) away, same height. I always like to push gently on each clip to make sure it’s secure—if it wiggles, the anchor isn’t tight enough, and your frame will fall later.
Step 5: Hang the frame. Almost done! Now, gently lift your frame by the sides (don’t pull on the wire bails—they can bend) and align each wire bail with the corresponding wall clip. Lower the frame slowly, and make sure both bails catch on the clips at the same time. Once it’s up, give it a tiny shake to test it—if it feels solid, you’re good to go. Step back, look at it, and if it’s straight, congratulations. If it’s a little off, don’t yank it down—you can adjust it by gently pulling one side of the frame until it’s level, no need to remove the clips entirely.
Wait, what if you want to hang multiple pictures in a gallery wall? That’s another question I get all the time. Our metal clips are perfect for gallery walls because they let you adjust the spacing between frames easily, without leaving a bunch of holes. I recommend laying all your frames on the floor first, arranging them until you like the layout, then using the same three mark rule for each frame to mark the wall. This is way easier than moving each frame up and down the wall until it fits.
Now, let’s talk about common mistakes people make that I see every single week. First, using too small a clip for a heavy frame. Last month, a customer told me their 15-pound canvas fell off the wall and cracked because they used a clip rated for 5 pounds. It’s not worth saving a few cents on a cheaper clip—our weight ratings are tested in real homes, not just labs, so you know your frame is secure. Second, not accounting for wall imperfections. Old walls can be uneven, so if you’re hanging a large frame, you might need to adjust the height of one clip a quarter of an inch to make it level. Third, leaving too much slack in the wire. If the wire between your frame clips is too loose, the frame will tilt forward, which makes it look messy and can even cause it to slip off the wall. Our clips eliminate that slack because they hold the frame firmly, so you don’t have to mess with wire tension at all.
If you’re worried about making holes in your walls, as I mentioned earlier, we also make removable metal clips for renters. These don’t require any nails or anchors—you press the gripping pad against the wall, and they hold up to 10 pounds. I tested one in my own apartment last year, hanging a 12×12 inch wood print that got direct sunlight for 8 hours a day, and it didn’t slip once for six months. When I moved, I just pulled the clips off and the wall had no residue or holes. That’s a game-changer for anyone who can’t modify their space.
At the end of the day, hanging pictures should be something that’s easy and rewarding, not a stressful chore. I started this metal clips supplier because I was tired of seeing people ruin their art or their walls with bad hanging methods. Every clip we make is designed with that in mind—simple, reliable, and versatile enough for every frame, every wall, and every style.

If you have any questions about which clip is right for your project, or you want to stock up for your home or business, feel free to reach out to our team for a consultation. We work with homeowners, interior designers, small businesses, and art galleries, and we can help you find the perfect solution for your specific needs. Whether you’re hanging a single family photo or an entire gallery wall, we’re here to make the process as smooth as possible.
Metal Clips References:
- American National Standards Institute. (2021). Standard for Picture Hanging Hardware Load Ratings. ANSI/BHMA A156.30-2021.
- National Association of Home Builders. (2022). Wall Hanging Best Practices for Residential Spaces. NAHB Housing Journal.
- International Interior Design Association. (2023). Hanging Art for Aesthetic and Structural Integrity. IDA Professional Guidelines for Residential Design.
- U.S. Department of Housing and Urban Development. (2020). Reversible Wall Modifications for Rental Properties. HUD Housing Guide for Renters.
Qingdao Xinding Huiyuan Industry and Trade Co., Ltd.
We are one of the most experienced metal clips manufacturers and suppliers in China. With a professional production team, we are able to meet the needs of the majority of our customers. Please rest assured to wholesale customized metal clips at competitive price from our factory.
Address: No.149, Yuyuan Street, Chenggang Road, Laizhou City, Yantai City, Shandong Province
E-mail: lin@lzhdwj.cn
WebSite: https://www.hdmetalparts.com/
